Looking for a special bauble for your Christmas tree? Or maybe you love owls and would like to hang one in your home year round? Try making this gorgeous barn owl ornament.
If you’d like to felt along, download my free PDF pattern (the same one I use in the video).
I created a step by step video of the process I followed to needle felted this barn owl. You can use the colors I chose or adapt them to fit your style and decor.
Tools and supplies used in this project
I have included Amazon affiliate links for some of the items below. This means I may earn a small commission (at no extra cost to you) if you click through and make a purchase. Thank you in advance if you decide to support my work using these links. Doing so helps me continue to create content for you!
Tools
- Epson EcoTank ET-2800 Wireless Color All-in-One Cartridge-Free Supertank Printer
- Pink American Crafts Self Healing Cutting Mat, 18 x 24-Inch
- Small Woolbuddy Felting Mat
- Assortment of Coarse, Medium and Fine Felting Needles (2 of each)
- 36 Star (Coarse) Felting Needle
- 38 Star (Medium) Felting Needle
- 40 Twist/Spiral (Fine) Felting Needle
- Ball head pins
- Dritz Sewing Gauge
- Small awl – came with an inexpensive needle felting starter kit
- Revlon Stainless Steel Slant Tip Tweezers
- Fiskars Micro-Tip Easy Action Shears
- Large eye beading needle
- Gingher Embroidery Scissors
- Bead Storage Organizer 24 Twist Top Jars in Plastic Container
- Dritz 5” Long Doll Needle
Supplies
- Printer paper
- Colored pencils
- Off-White Chunky Core Wool
- Scrap of sheet felt
- Air erase marker
- Sharpie marker (Peach)
- Coats Dual Duty General Purpose Thread, Bright Aqua
- Sunshine Felter’s Palette Carded Wool
- Pumpkin Pie Felter’s Palette Carded Wool
- Saffron DHG Maori Carded Wool
- Desert Camel Tan Wool Roving
- Storm/Slate DHG Carded Extra Fine Merino
- Storm/Slate DHG Maori Carded Wool
- Dark (Black) DHG Carded Extra Fine Merino
- Natural White DHG Carded Extra Fine Merino
- Cotton White MC-1 Merino Batt
- Shell DHG Carded Extra Fine Merino
- Black 11/0 Toho Glass Seed Beads
- Transparent Frosted Crystal 11/0 Toho Glass Seed Beads or White
- 00 Nymo Nylon Beading Thread
- DMC Gold Metallic Embroidery Thread
Step-by-step instructions
PDF pattern and coloring page
Download my free PDF pattern to use as a stencil for the ornament’s proportions and details. I also included the colored in version. I created this to determine the pattern and palette for this piece. The photo below shows my color plan and core wool owl after I drew the pattern on it with a Sharpie marker.

You can follow this plan or print the outline and create your own coloring page!
Core wool
- Start with an 11-12” piece of core wool. Gently expand it horizontally into a wide ribbon with one edge thick and one thin. I used a total of 7.8 grams or about a quarter ounce of core wool.
- Fold it over a few times so it is a little larger than the pattern. Try to keep the surface smooth.
- Begin felting the core wool into sort of a flat ice cream cone shape. Use a coarse needle. I used a 36 star.
- Keep turning and felting your core wool into the shape of the pattern. It is important to evenly felt it so it won’t be lopsided. I felted my core wool with a coarse needle for about 15-20 minutes. Then I switched to a medium 38 star needle and felted it for 10 minutes.
- Check the shape against the pattern. Mine was a good length and height. But it was too thin. Tear off small sections of core wool and layer them to build up any areas that need it.
- Give the whole piece a final felt with a medium needle to firm it up. Ideally, the core wool should be slightly smaller than the pattern.
Drawing the pattern on the core wool base
- Use an alcohol marker or a pen to draw your pattern on the core wool. I sketched my lines with an air erase marker first in case they weren’t right. Once I was happy with them, I drew over those lines with the alcohol marker. I drew a small section at a time so I captured the line before they disappeared.
- Slowly work your way around the ornament. You don’t need to include all the lines. Just capture the major sections and any that you think might be helpful as a reference.
Felting the feathers
Block in the feathers with a thin layer of top coat. It may be helpful to refer to the photos of the finished ornament at the bottom of this post. I followed my coloring page and started with the back of the owl. Here’s the order I followed:
- Felt the sliver of tail feathers in a pale yellow
- Felt the tips of the bottom row of feathers in reddish brown
- Felt the tops of the bottom row feathers in golden yellow
- Outline the bottom row of feathers in a dark gray
- Felt the tips of the middle row of feathers in dark gray
- Felt the tops of the middle row feathers in golden yellow
- Outline the bottom dark gray area of the middle row of feathers in black
- Outline the golden yellow sides of the middle row of feathers in dark gray
- Felt the tips of the top row of feathers in golden yellow
- Felt the tops of the top row feathers in white
- Outline the bottom reddish brown area of the top row of feathers in black
- Outline the golden yellow sides of the top row of feathers in dark gray
If you’re not sure what the difference is between wools, take a look at my What type of wool should I use? post https://theneedlefelter.com/what-type-of-wool-should-i-use/
The back of the owl’s head
- Cover the darkest area of the back of the head with dark gray.
- Felt a crescent shape of the reddish brown into the curved edge of the dark gray.
- Add golden yellow to the remaining back of the head. Don’t take the yellow too far across the sides or top of the head as that will be white.
- Mix a small amount of golden yellow with the reddish brown. Apply a thin strip of this over the join of the golden yellow and reddish brown on the head. This will soften that line.
- Mix a small amount of the reddish brown and dark gray. As in the previous step, felt this over the area where the reddish brown and gray meet. This gives the head a little bit of a gradient effect.
Finishing the feathers
- Add dark gray horizontal lines to the bottom row of the feathers and reddish brown lines to the top and middle rows. The lines should have a scooped or scalloped look. They aren’t straight across. To differentiate them from the outlines, keep these lines wider than the outlines and a little more wispy.
- Add gray horizontal lines to the tail.
- Flip the owl over and start the front. Add reddish brown tips to the end of the bottom row of feathers and golden yellow to the top of the feathers in the bottom row.
- Fill in the two top row feathers closest to the owl’s chest with reddish brown.
- Outline the bottom row feathers in dark gray.
- Fill in the remaining top row feathers with golden yellow on the tips and white on the top edge.
- Outline the bottom of the top row of feathers in black line to match the back. Outline the sides of the top row feathers in dark gray.
- Add dark gray horizontal lines to both rows of feathers.
The owl’s face and chest
- Mix some reddish brown and dark gray wool. Rolled a thin line of this and outline either side of the owl’s eye to the beak and the top of the beak.
- Fill the beak in with a light pinkish brown. If you have trouble seeing the edges of the pinkish brown against the core wool (I did), fill in that area with white wool.
- Outline the beak with dark gray.
- Add white above the beak and between the eyes.
- Roll two balls of black wool the same size for the eyes and felt them in place.
- Add white wool to the entire inside of the barn owl’s heart shaped face.
- Outline the hear with a thin rope of reddish brown cross the top, the reddish brown and gray mix on the sides, and dark gray around the bottom.
- Felt golden yellow wool above the heart to fill in the top of the head.
- Cover the rest of the head and body with white.
- Add a very thin layer of the reddish brown and gray mix to the outer edge of the eyes to give them that cat-eye shadow look.
- Roll two tiny balls of natural white and felt them into the upper right corner of each eye as a highlight.
- Add a thin layer of dark yellow under the bottom edge of the heart outline and a little at the bottom of the white body near the tail.
- Finally, add a small layer of the reddish brown and gray mix to the left side of the beak to create a tiny shadow.
Adding beaded dots to the front
- On the front of the owl, sew a black and a white seed bead to the center of the gold feather sections in the bottom row.
- Add the beads to the two reddish brown feathers in the top row.
- I knotted the thread and bury it in the ornament.
Adding a hanger
- Using an extra long doll needle, thread a piece of metallic gold thread through the ornament to create a hanger.
- Leave about a 4 inch long hanger (8 inches of thread folded over).
- Tie a knot and pulled it inside the owl’s body.
The completed barn owl ornament
Your barn owl ornament is done! I love the way this project turns out.
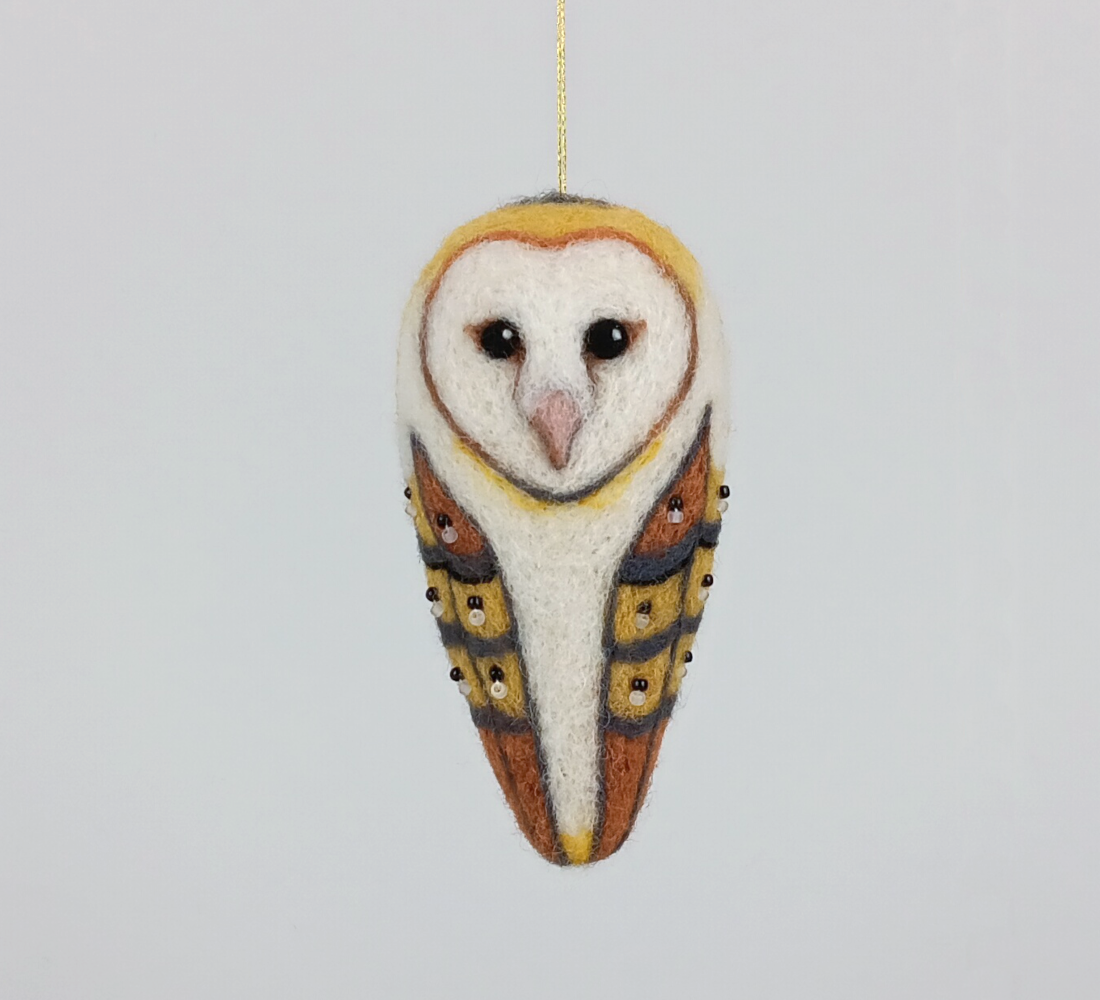
The design is flexible because it’s not specifically holiday. It will look lovely on a Christmas tree or hanging on its own year round.
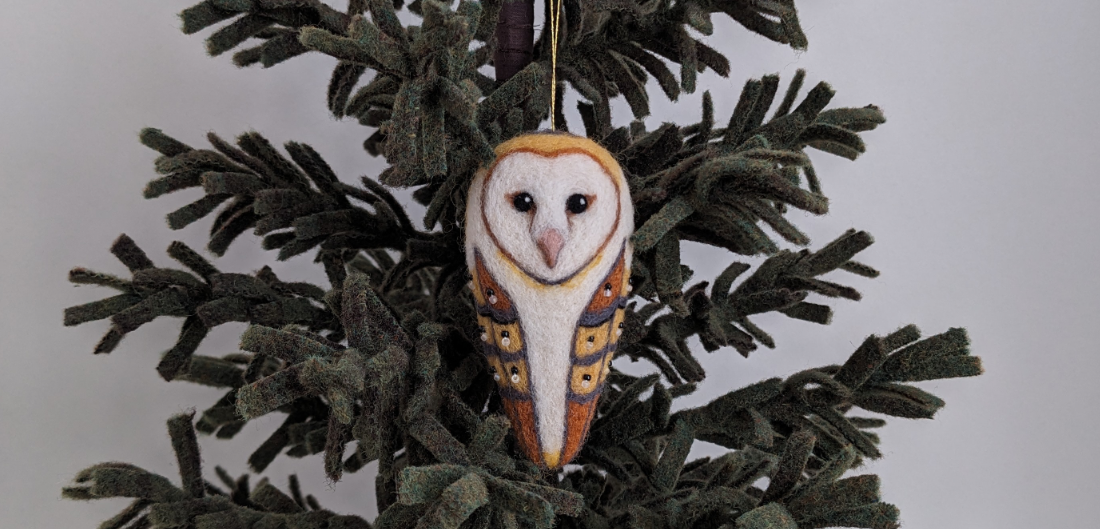
The photo at the top of this post shows the owl ornament hanging from a Wooly Pine Tree. Want to make your own tree? Take a look at my video on how I made mine.
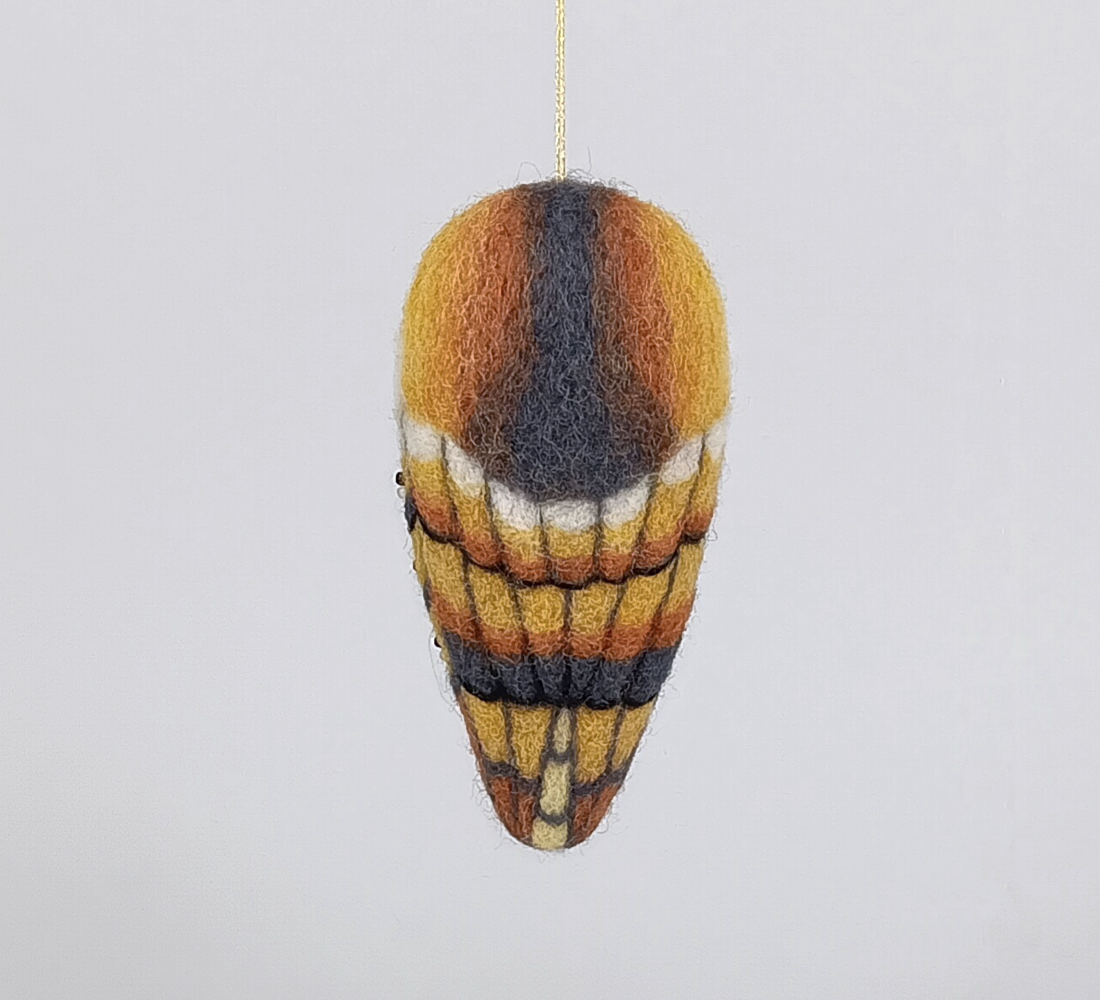
If you’d like to try another bird ornament that’s more three dimensional, check out my Hummingbird.
Or you could make the Bluebird or Goldfinch Tiny Bird In a Hoop without putting them in an embroidery hoop.
The photo of a real barn owl in the video is from the following photographer
- Barn Owl sitting in a window by Tisha Mukherjee, CC BY-SA 4.0, via Wikimedia Commons
Last Updated on January 24, 2025

 Unlock the Secret to Stable Needle Felted Animals! (FAQ #11)
  How to design realistic needle felted animals (FAQ #10)
  Ditch the chenille stems! The BEST way to wrap your armatures (FAQ #9)
  Armatures for felted animals + Lion Project kickoff! (FAQ #8)