Are you ready to take your needle felting skills to the next level? Understanding the nuances of felting needles is crucial, whether you’re a complete beginner or have been felting for a while. If you’ve ever felt overwhelmed by the sheer variety of needle types and sizes, you’re not alone!
That’s why I’ve created this new video (which you can watch below) as part of my FAQ series. And to further help you navigate the confusing world of felting needles, I designed a one-page, free PDF Felting Needle Guide for you to download.
In this third video of my FAQ series, I’m diving deep into the world of needle felting needles. We’re tackling the question: “What are needle felting needles, and what’s the difference between them?” This isn’t just a surface-level explanation; we’ll be exploring everything from gauges to types to how and when to use them.
In this video, you’ll discover:
- The anatomy of a needle: We’ll explore the design and industrial origins of these tools. I’ll show you how the tiny notches actually work.
- Gauge demystified: Learn what needle gauge means, common gauge numbers for felters, and how it impacts your felting projects.
- Needle types uncovered: Understand the differences between triangular, star, spiral (twist), crown, and fork needles, so you know what you’re buying or have.
- The role of reverse needles: Learn what reverse needles are and when you might consider using one.
- Practical applications: Find out which needle is best suited for each step in your needle felting process, from building structure to adding fine details.
- Expert recommendations: I share my personal recommendations for what needles are essential for beginners, the needles I keep on my worktable, and which ones you can skip.
I know that the sheer variety of needle options can be overwhelming, especially if you’re just starting out. My goal with this video is to clear up the confusion and give you a solid understanding of your tools so you can approach each project with confidence and expertise.
I will help you choose a needle for your current project and feel confident that you’re using the best needle for each step of your felting.
Tools and supplies used in this project
I have included Amazon affiliate links for some of the items below. This means I may earn a small commission (at no extra cost to you) if you click through and make a purchase. Thank you in advance if you decide to support my work using these links. Doing so helps me continue to create content for you!
- Pink American Crafts Self Healing Cutting Mat, 18 x 24-Inch
- Small Woolbuddy Felting Mat
- 36g Star (Coarse) Felting Needle
- 38g Star (Medium) Felting Needle
- 40g Spiral or Twist (Fine) Felting Needle
- 42g Spiral or Twist (Fine) Felting Needle
- 40g Orange “Beginner” Handle Star (Fine) Felting Needle
- 40g Green Handle Reverse Felting Needle
If you prefer to read rather than watch, here’s what I covered
What are needle felting needles?
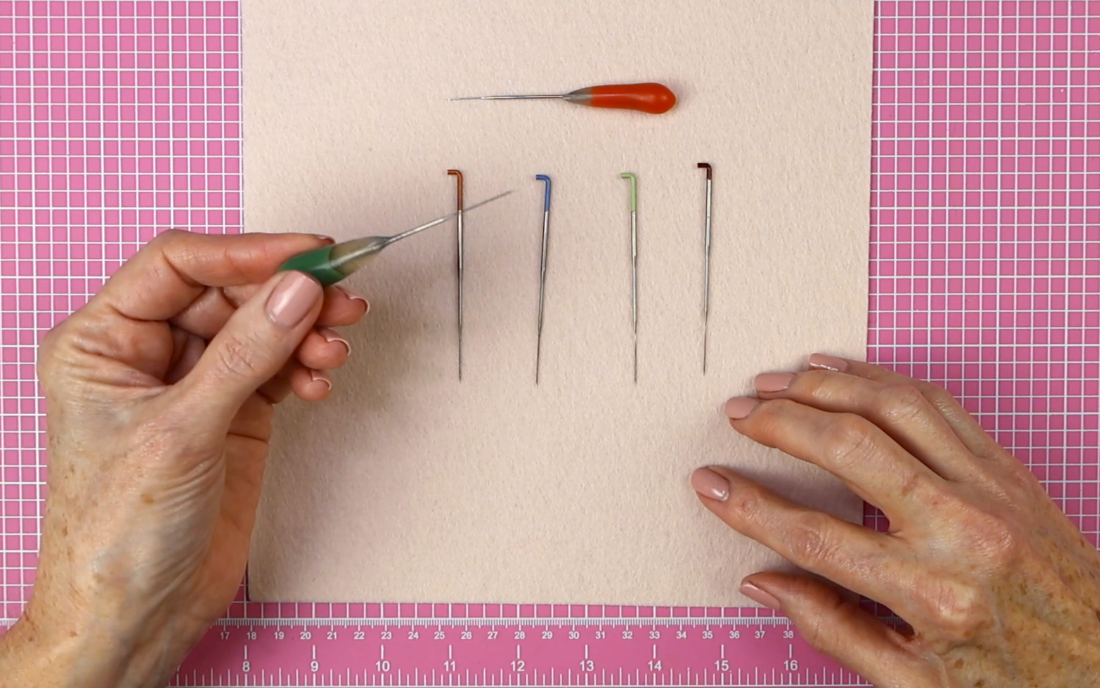
Needle felting needles are about 3 to 3 1/2 inches long. They have a perpendicular bend or handle at one end and a very sharp point at the other. They are designed to be used in industrial felting machines. Groz-Beckert offers more than 2000 different needles for industrial use. As artists and crafters, we use a tiny subset of these needles to create our pieces.
Felting needles have tiny notches near the pointed tip. These notches create tiny channels that catch strands of fiber and push it down, or in the case of “reverse needles,” pull it up and out. We’ll focus on regular needles first, and discuss reverse needles a little later. The width of the needle determines its gauge. The shape of the needle, the placement of the notches, the direction the notches face, and the number of notches determine the type of needle.
What is gauge? Is it Important?
So, what is “gauge” and why does it matter? Felting needles for arts and crafts are usually available in these gauges: 32, 36, 38, 40, and 42. Now, I’ve never seen a 34-gauge needle offered and I have no idea why. It’s a mystery!
Generally speaking, 32 and 36 gauge needles are referred to as coarse. They’re the thickest of the bunch. Thus, they impact a larger area and you see results quickly. They are great for creating a base and building structure. 38 gauge needles are considered medium. They are versatile and can be used for almost anything except very delicate work. And 40 and 42 gauge needles are referred to as fine. They are the thinnest and give you more control when working on the surface or small areas. They are used for adding detail and finishing.
Needle types
- Triangle: This needle has a triangle-shaped shaft (or working tip) with regularly spaced notches on three edges. I’m not sure if shaft is technically the correct term for this section of the needle. But I’m using it to refer to the area of the needle with the notches.
- Star: The star needle has a four-sided shaft with regularly spaced notches. It looks like it has a vertical line running down it. The star grabs a little more wool than the triangle. Since it has four notched edges versus the triangle’s three edges, the star has more notches overall.
- Spiral or Twist: This is a triangle needle shaft that has been twisted into a spiral. The twisted needle shaft penetrates the wool more efficiently and deeply, at least in theory. I’m not sure that it makes a huge difference when you’re felting by hand. But I’ll admit that my 40 and 42 gauge fine needles are spiral and I love working with them. Other people swear by straight needle shafts. Maybe try one and when you run out, try the other. That way you can decide for yourself.
- Star Spiral or Twist: The is a star needle shaft that has been twisted into a spiral.
- Crown: A crown needle has one row of notches near the tip. I’ve read that they are useful for adding fine details since they don’t push the fiber in as deeply as other needles. But honestly, in all the tutorials I’ve ever read or watched, I’ve never seen any animal felters use one.
- Fork: A forked needle doesn’t have notches; instead, its tip is split into two sections, creating a channel or fork to grab small amounts of fiber and push it in. It’s often used for “rooting” hair, but I’ve never used one for my work.
- Reverse: A reverse needle has notches facing the opposite direction of regular needles. So instead of pushing fiber in, it pulls it out. You can use this to add texture, create fuzz, or correct mistakes, but we won’t be diving deeply into that today.
When to use different sizes and shapes
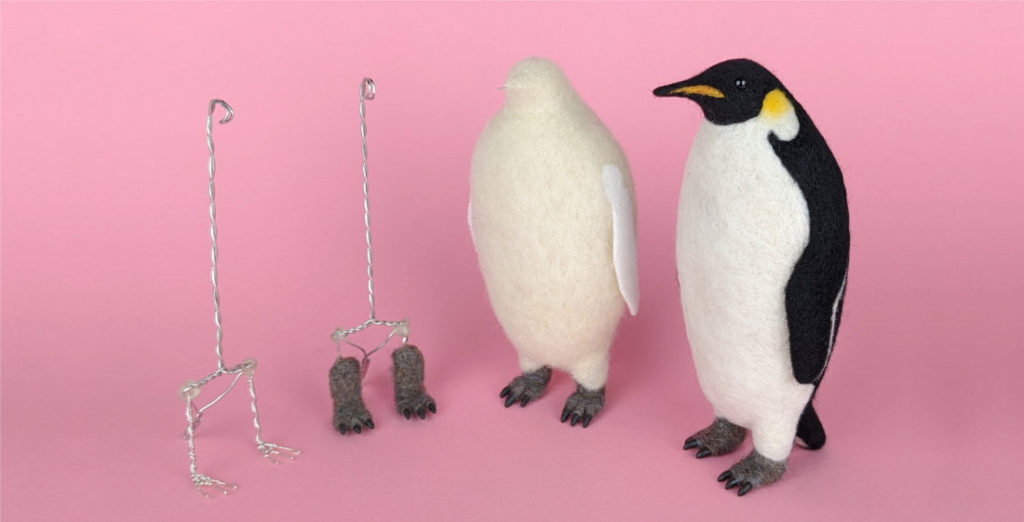
Typically, the needle you choose depends on the task. When creating a sculpture: at the beginning, I use a coarse needle to rough out shapes. When I feel resistance, I switch to a medium needle and I use that for the majority of the work on a piece. If I’m adding fine details, I switch to a fine needle.
But it depends on the size of the details and the type of wool I’m working with. For example, very fine wool is easier to control with a medium or fine needle. If I’m working with a wire armature, I tend to use a medium needle to tuck in ends when wrapping the wire. Then I will use a coarse needle when I start to form the shapes around the wire. So there can be a little jumping around.
If I’m creating a wool painting, I usually stick to medium and fine needles since I’m felting layers of wool onto a relatively thin surface like linen fabric or felt sheet. A coarse needle is too aggressive and would most likely damage that type of piece.
How many types and gauges should you buy?
It’s fun to say, “I have 20 different needle felting needles” and show people your collection. Many sellers offer expensive pre-packaged assortments. But, when you read the descriptions of the individual needles, the uses overlap or apply to very niche applications.
I fell prey to needle hoarding when I started and purchased assortments. I tried the specialty needles once or twice and never picked them up again. I’m sure these subtle variations in specialty needles are valuable for machines that use 100s of needles at a time. But in my opinion, they don’t make much of a difference when you’re felting by hand.
As a beginner, I recommend starting with a pack of 38-gauge star needles. They’re fantastic all-purpose needles. It’s still the needle I grab most of the time when felting.
If you want a wider range, the needles I keep on my worktable are a 36-gauge star or triangle (both seem to work about the same), a 38-gauge star, and a 40-gauge twist. You can make almost anything you want with these three needles.
I also use the 40-gauge star needles with the orange silicone handle from Felt Alive. I like these because the handles allow me to use them comfortably when I don’t want use a needle in a long holder. I have a 42-gauge twist for very fine detail. But honestly, I don’t use it very often. You might also want to try a reverse needle for blending and texture. I keep one of Felt Alive’s green handle reverse needles around just in case..
How to tell needles apart
What if you mix up your needles? It depends on the amount of needles types you have. If you have a lot, it is going to be more difficult. If you have the three or four I use, it’s fairly easy.
The first thing you can try is poking them into some semi-felted wool to feel the difference. It needs to be semi-felted so you can feel the amount of resistance from each needle. A 36 is is going to feel a little harder to push in the wool than a 38 or 40.
You can also examine the needles under a magnifier, or zoom in with your phone camera to see which are stars or twists or triangles.
To prevent mixups, you can flag your different needle types. I have four needle holders on my work table. Three are different woods. I put a 36 gauge star in the darkest one, a 38 star in the medium one and a 40 gauge twist in the lightest one. In my red metal holder, I keep a 42 gauge twist. I made myself a travel needle holder and painted the tips with nail polish to tell them apart. I tried using Sharpie markers to color code them but I found that rubs off.
Are there any questions I didn’t address? Did you find my advice helpful? Leave a comment at YouTube for me! I will be planning my future videos based on your questions. Also, please check out the playlist for my FAQ series on needle felting if you missed any of the previous videos.
Don’t forget to subscribe to my YouTube channel and bookmark this website so you don’t miss any of my tutorials or other content.
The Cardinal photo in the video is from the following photographer
- Photo of Cardinal in the snow by Skyler Ewing on Unsplash