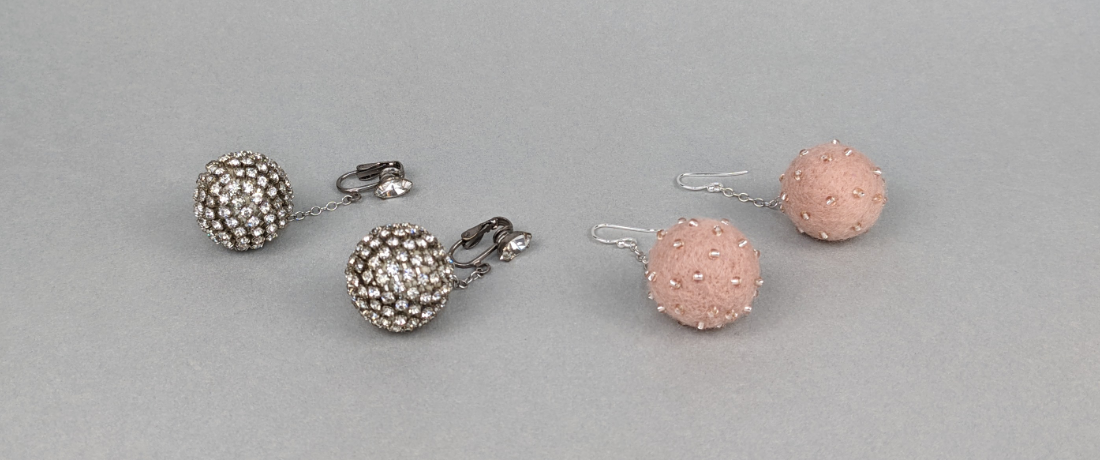
One of my favorite pair of vintage earrings is too dressy to wear most of the time. So, I’m going to make a casual version using wool and seed beads!
For this project, I’ll needle felt solid color wool beads and sew seed beads to them. I’ll explain what I used, show you each step of the process, and give you tips for needle felting your own wool beads.
Reasons to try making beads with wool
- Felted beads are lightweight. If heavy earrings are painful to wear, wool beads might be perfect for you.
- You can make needle felted beads in any color you want. If you’d like a gradient or marbled feel, you’ll have more control than you would if you wet felted the beads.
- You can needle felt beads in all sorts of shapes.
- You can embellish your wool beads with smaller beads or rhinestones. You can embroider them. And of course, you can needle felt details or designs on them.
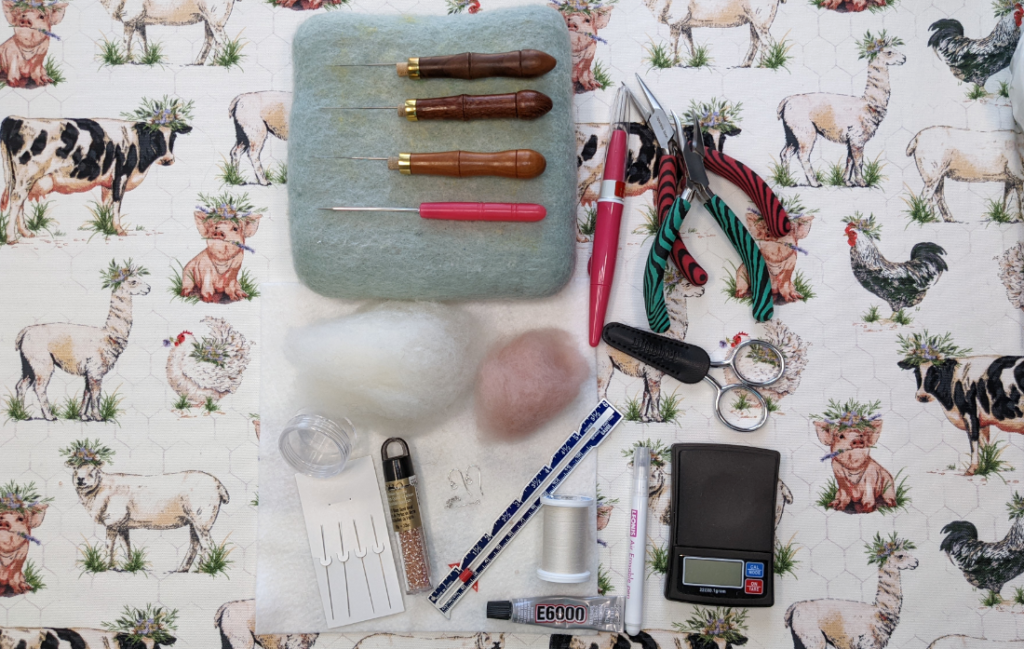
Here are the supplies and tools I used
I have included Amazon affiliate links for some of the items below. This means I may earn a small commission (at no extra cost to you) if you click through and make a purchase. Thank you in advance if you decide to support my work using these links. Doing so helps me continue to create content for you!
- 2 grams of Sarafina core wool
- 0.6 grams of DHG Short Fiber Merino in Shell
- Felting Needles Set of 36 Star, 38 Star, and 40 Spiral (5 of each) in a metal tin
- Small Wool Buddy Felting Mat
- Toho 11/0 Seed Beads
- Small container to hold the seed beads so they don’t roll away
- Cream Coats & Clark 100% Polyester All Purpose Thread
- 1 Beading Needle
- 2 Eyepins, I made mine out of 20 gauge wire, they are 1/2″ long
- 2 pieces of Chain 3/4” long (1 1/2″ total length)
- 2 French Hook Ear Wires
- E600 Glue
- Wire cutters
- Chain Nose Pliers
- Thin Awl (included in a beginner needle felting supply kit)
- Embroidery scissors
- Sewing Gauge or Clear Ruler
- Dritz Air Erasable Marker (optional)
- Small scale (optional)
- Clover Pen Tool with fine needles (optional)
How to make the earrings
- Roll and slowly felt a round bead out of 1/2 of your core wool using a 36 Star needle. Don’t stab your needle deep into the wool. Aim for the center of the ball so you create an even, firm piece. I spent about 10 minutes felting this step.
- Roll the bead between your hands every so often to help encourage it into a round shape.
- Once you feel resistance using the 36 needle, switch to a 38 star. Spend about 5 -10 minutes felting around your bead to firm it further.
- Since you’re making earrings, you want your two beads to be close to the same size. Weigh your bead to find out how much core wool you used. Use the same amount to make your second bead.
- Wrap the half the merino around your bead. Take your time and try to lay it on smoothly. Felt it using 38 star. Refine it with a 40 spiral to smooth and finish the surface. Weigh your bead again so you know how much merino to add to your second bead.
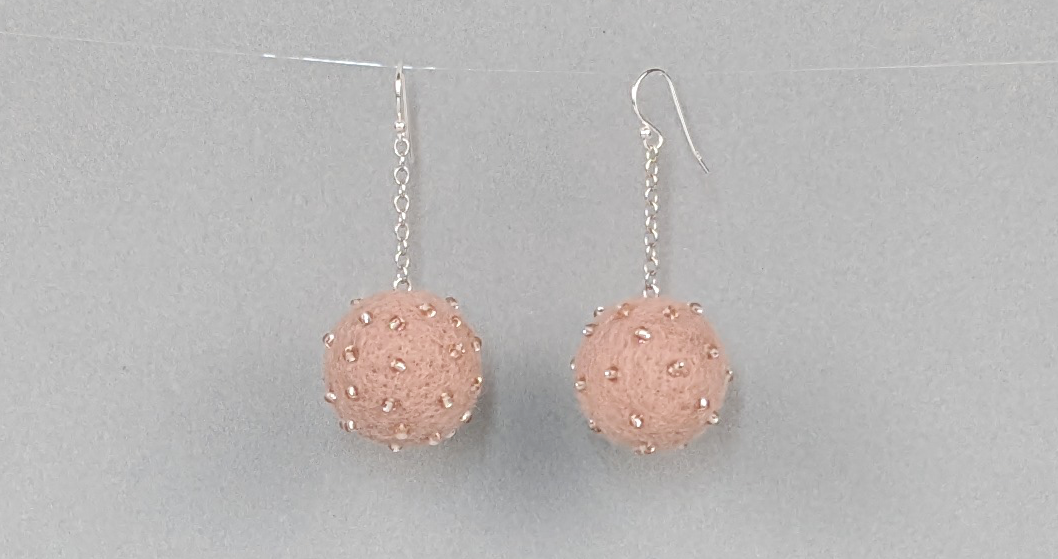
- Attach a chain to an eyepin using the chain nose pliers. Poke hole in the bead to insert the eyepin. Glue the eyepin in using E600. Let the glue dry.
- Thread your needle and tie a knot at the end but leave a thread tail. Sew into the wool in a spot where can hide it. I hide my knot in the bottom of my bead. Make a divet in your bead with your awl and the pull knot up into it. Trim off the thread tail.
- Add dots to beads with an air dry marker to indicate where you want to place seed beads. Sew seed beads to the dots.
- When you’re done, pull the thread through your bead a couple of times at different angles. I ran mine through a couple of beads a second time. Make a knot if you can or just cut the end of the thread off.
- Add a French Ear Wire to the end of the chain.
- Wear your earrings or give them to someone special as a gift!
I hope this was fun and inspires you to try recreating something you love in wool!
Last Updated on April 2, 2024

 Unlock the Secret to Stable Needle Felted Animals! (FAQ #11)
  How to design realistic needle felted animals (FAQ #10)
  Ditch the chenille stems! The BEST way to wrap your armatures (FAQ #9)
  Armatures for felted animals + Lion Project kickoff! (FAQ #8)