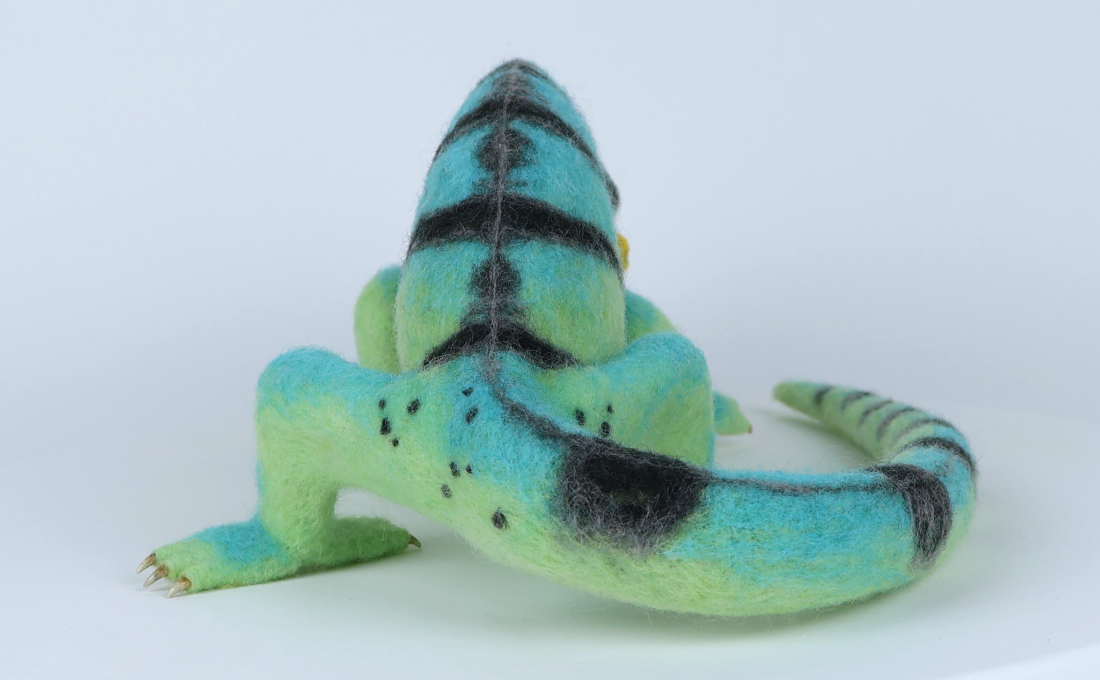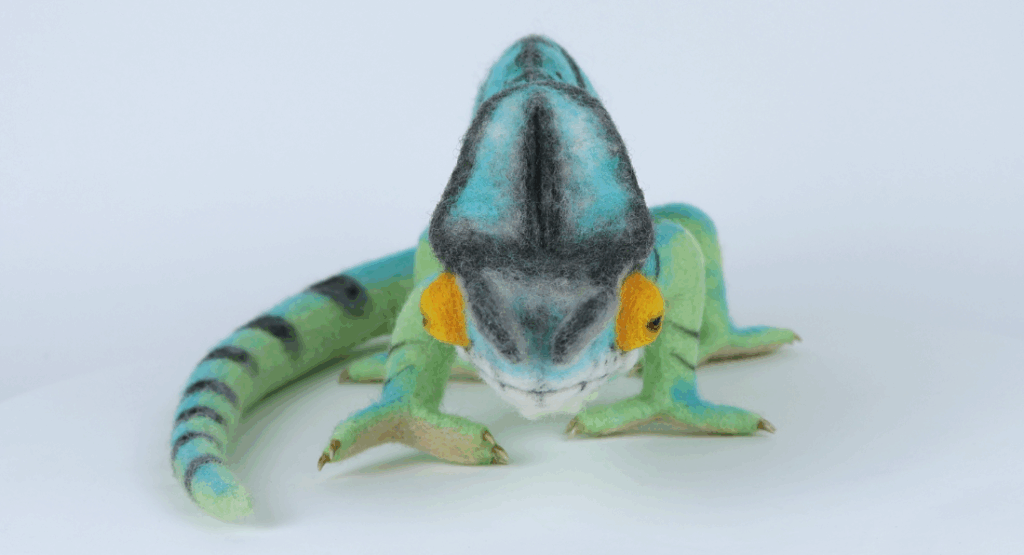
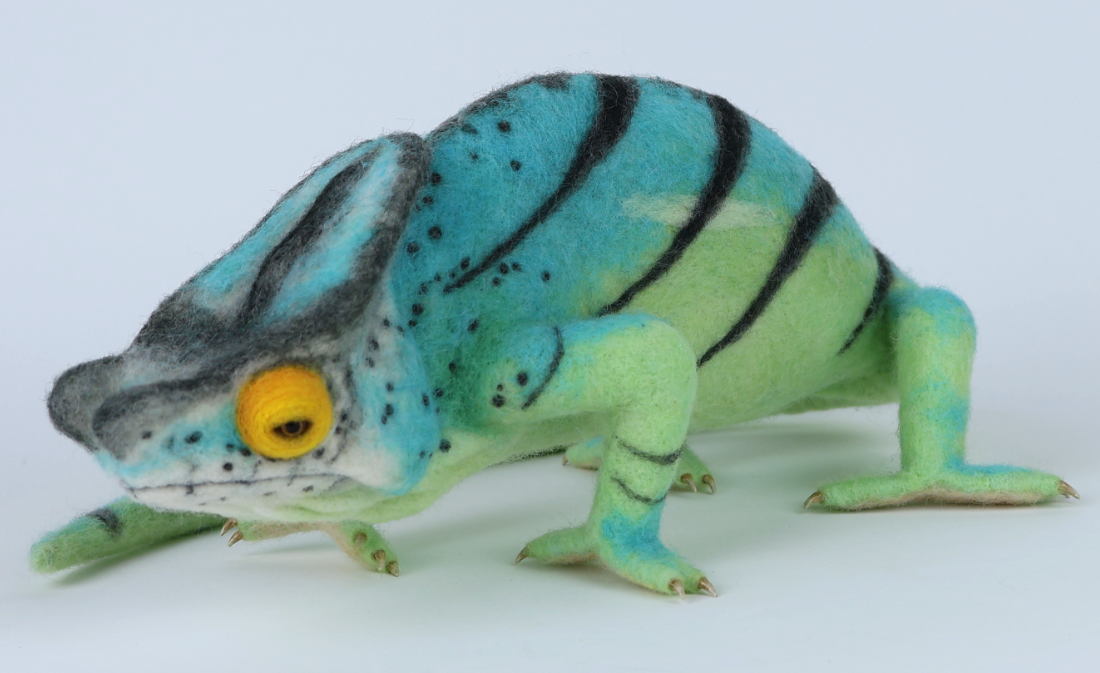
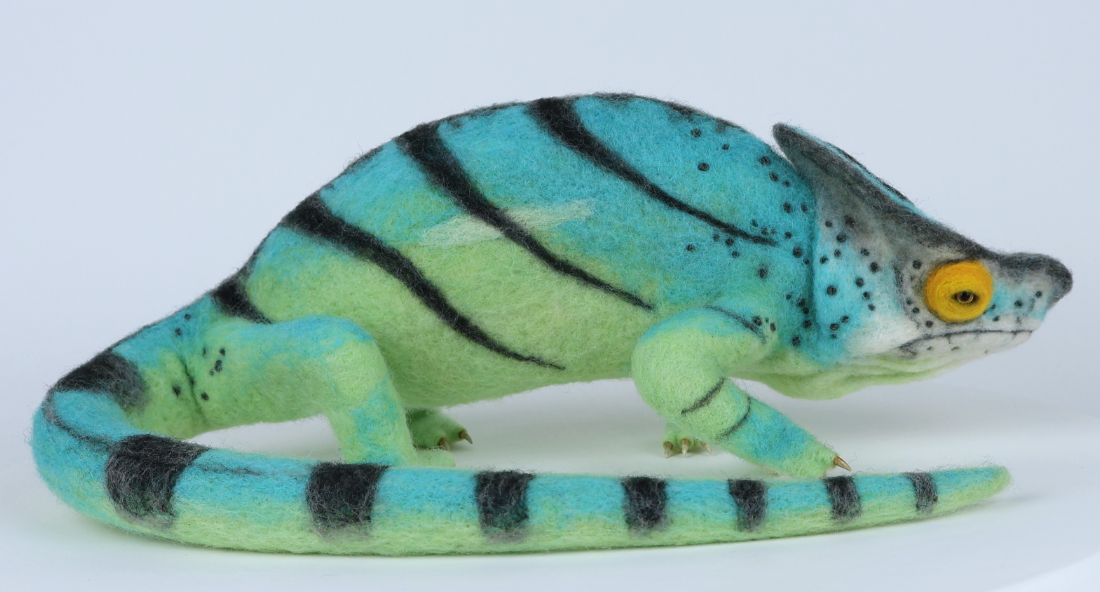
If you’re looking for a challenging and inspiring needle felting project, you’re going to love this one! In my latest video, I take you behind the scenes as I create a needle-felted Parson’s Chameleon — one of the largest and most colorful chameleons in the world.
While this isn’t a full step-by-step tutorial, I walk through every phase of the process, share key techniques, and explain some of the creative decisions and challenges that came up along the way. If you’re someone who enjoys sculpting wild animals in wool, or if you’re curious about felting more unusual creatures, this video is packed with ideas to get you inspired.
🦎 Watch the video here:
Free Pattern Download
To help me stay true to the chameleon’s proportions, I created a simple pattern that marks where the head, body, limbs, and tail should go.
🎨 Download the free Parson’s Chameleon pattern (PDF)
You can print it out and use it as a guide for wire armature placement and for testing color blends before felting. The chameleon is wider than a normal piece of printer paper. To make a one piece pattern, you can cut the second page down and tape it to the first page (like I did in the video).
What Makes the Parson’s Chameleon Special?
This project started when someone saw the smaller Panther Chameleon I made (using wool dyed with an Easter egg kit!) and asked if I’d consider tackling a Parson’s Chameleon. I said yes — partly because it was a request, but also because the Parson’s is such a fascinating and unique animal with stunning coloration, zygodactyl feet, and expressive eyes.
Tools and supplies used in this project
I have included Amazon affiliate links for some of the items below. This means I may earn a small commission (at no extra cost to you) if you click through and make a purchase. Thank you in advance if you decide to support my work using these links. Doing so helps me continue to create content for you!
Check out the tools, supplies, and needle felting related books I recommend in My Amazon Shop.
Tools
- Small Woolbuddy Felting Mat
- Assortment of Coarse, Medium and Fine Felting Needles (2 of each)
- Wire Flush Cutters
- Chain Nose or Needle Nose Pliers
- Dritz Sewing Gauge or ruler
- Toaster Oven Baking Sheet
- Soft Bristle Paint Brush Set
- Small Painter’s Palette
- Epson EcoTank ET-2800 Wireless Color All-in-One Cartridge-Free Supertank Printer
- Pink American Crafts Self Healing Cutting Mat, 18 x 24-Inch
Supplies
- Printer Paper
- Colored Pencil Set
- 18 gauge Cloth Wrapped Wire
- 22 gauge Cloth Wrapped Wire
- 26 gauge Cloth Wrapped Wire
- 18 gauge Aluminum Wire
- 26 gauge Stainless Steel Wire
- 26 gauge Copper Wire
- Sharpie Marker
- E6000 Glue
- Off-White Chunky Core Wool
- Air Erase Marker
- Cosclay DOLL Faerie Light Medium-Firm
- Aluminum Foil
- Cupcake Paper Liners
- Assortment of wool carded and combed top
- 4 or 5mm Glass Eyes
- Kleancolor Nail Lacquer 162 Metallic Yellow
- Matte Folk Art Acrylic paint (purchased at Hobby Lobby) in Podge Yellow and Mushroom
- Mungyo Gallery Soft / Chalk Pastel Set
- Satin Mod Podge
Step-by-Step: How I Made This Parson’s Chameleon
If you prefer written instructions, here’s a simplified breakdown of the steps I followed:
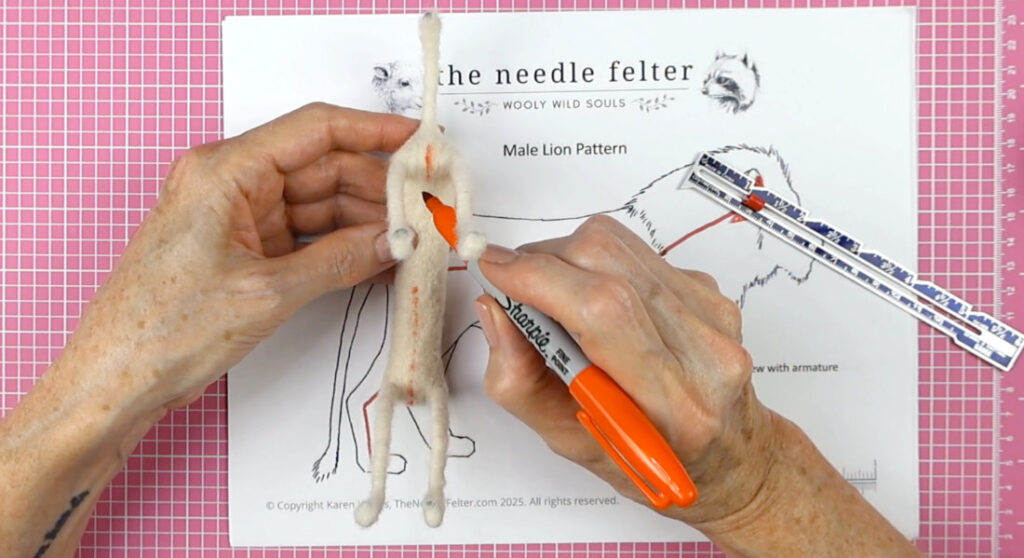
1. Design the Pattern
- Sketched a rough outline of the chameleon for pose and proportions.
- Used the sketch as a coloring page to test and plan wool colors.
2. Build the Armature
- Constructed each limb and body section separately.
- Used thicker gauge wire for head, body, tail, and limbs.
- Reinforced critical areas like the tail and spine for strength.
3. Create Durable Claws
- Sculpted claws from Cosclay around stainless steel wire.
- Baked them in a foil-lined cupcake tray to avoid flattening their shape.
- Glued claws onto limb wires with E6000 and let them dry overnight.
4. Felt the Body with Core Wool
- Wrapped and shaped core wool around the body armature.
- Stopped the core wool short of the tail tip to prevent white wool from showing through the topcoat.
- Focused on getting correct proportions: belly, limbs, and tail shape.
5. Felt the Legs and Feet
- Used core wool for the legs; topcoat wool for thinner feet areas.
- Attached claws with glue, dried upside down to protect them.
6. Build the Head
- Created a flat felt sheet shape for the head ridge.
- Built up core wool underneath for depth.
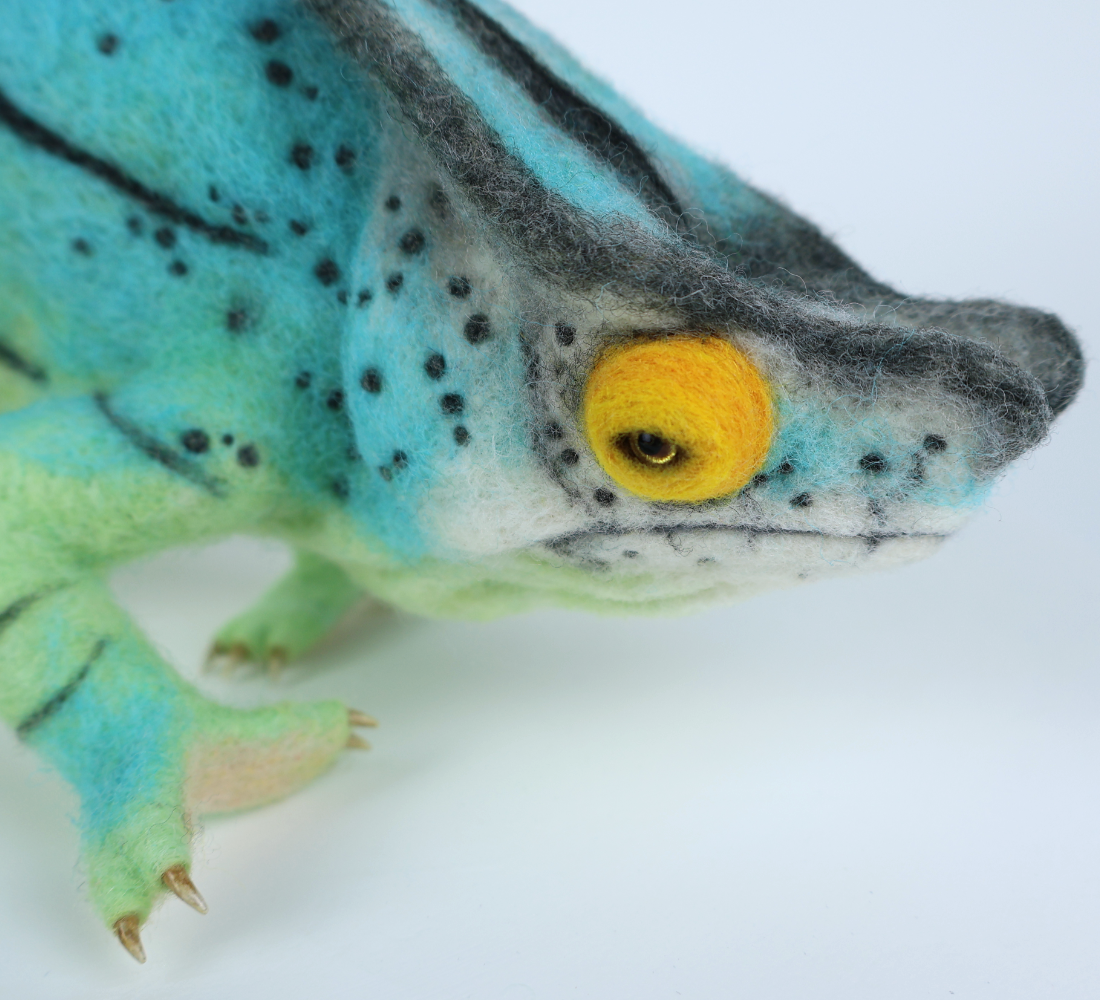
- Rolled and attached eye balls with wool.
7. Paint and Attach the Eyes
- Painted the backs of glass eyes to create sparkle and depth.
- Secured them in place on the head.
8. Apply the Topcoat
- Used the coloring page as a guide for applying the finer topcoat wool.
- Blended colors and paid attention to gradients and patterning.
- Added thin layers of wool shading for realism.
9. Final Assembly
- Connected body parts securely.
- Continued blending and refining with topcoat wool.
- Added pastel and acrylic details to claws and sealed with Mod Podge.
Final Thoughts
This was such a fun and rewarding project. The Parson’s Chameleon might not be the easiest animal to needle felt, but that’s what makes it so satisfying to create. I hope this post inspires you to try sculpting your own wild animal in wool!
🧵 Until next time — Felt Some Thing, or if you don’t felt, Make Some Thing!