I have not done any 2D (also called wool painting) projects for some time. I’m itching to improve those skills as I find them tremendously helpful in both 2D and 3D work. I decided to make the Rabbit from Dani Ives Painting with Wool: Essentials to Mastery course. This is just one of the seven full length projects included in this course.
- I have included Amazon affiliate links for some of the items below. This means I may earn a small commission (at no extra cost to you) if you click through and make a purchase.
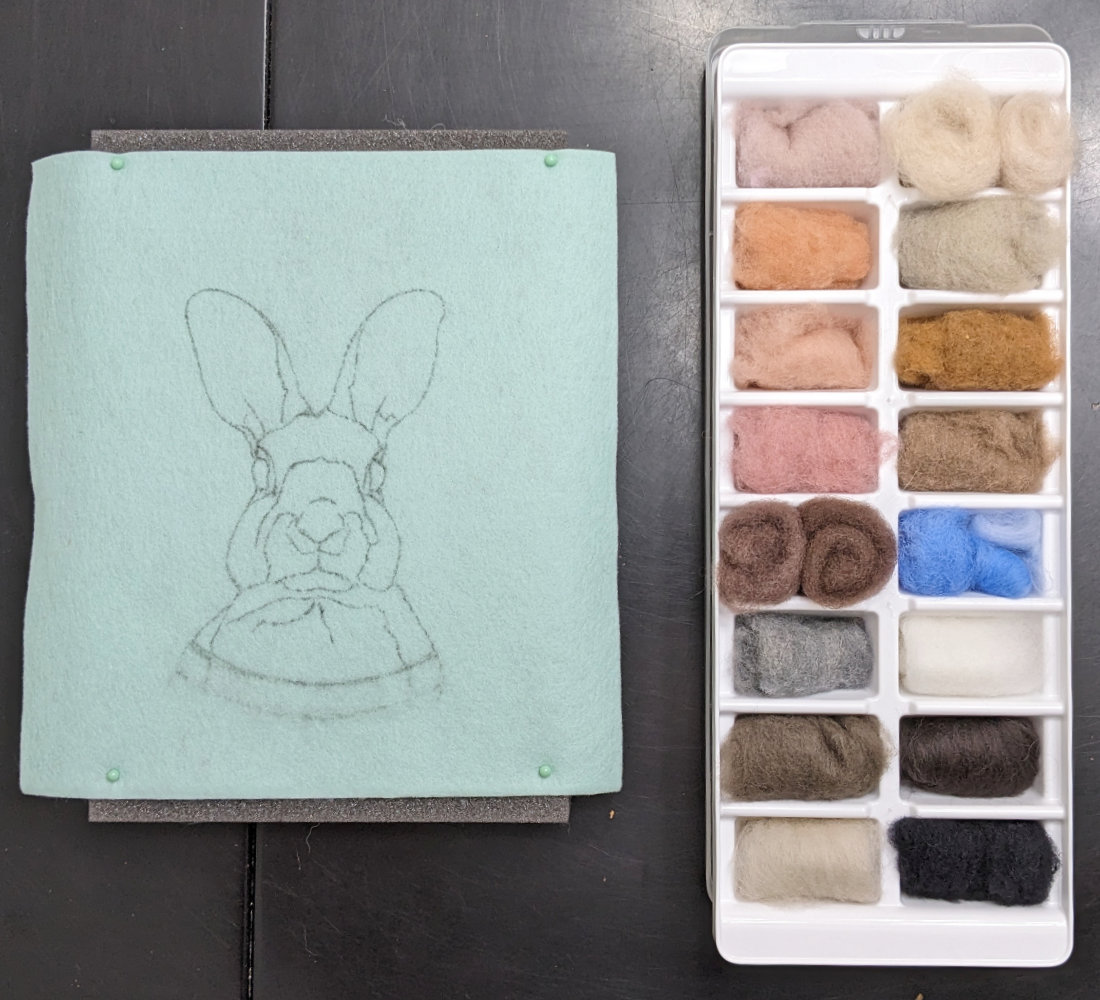
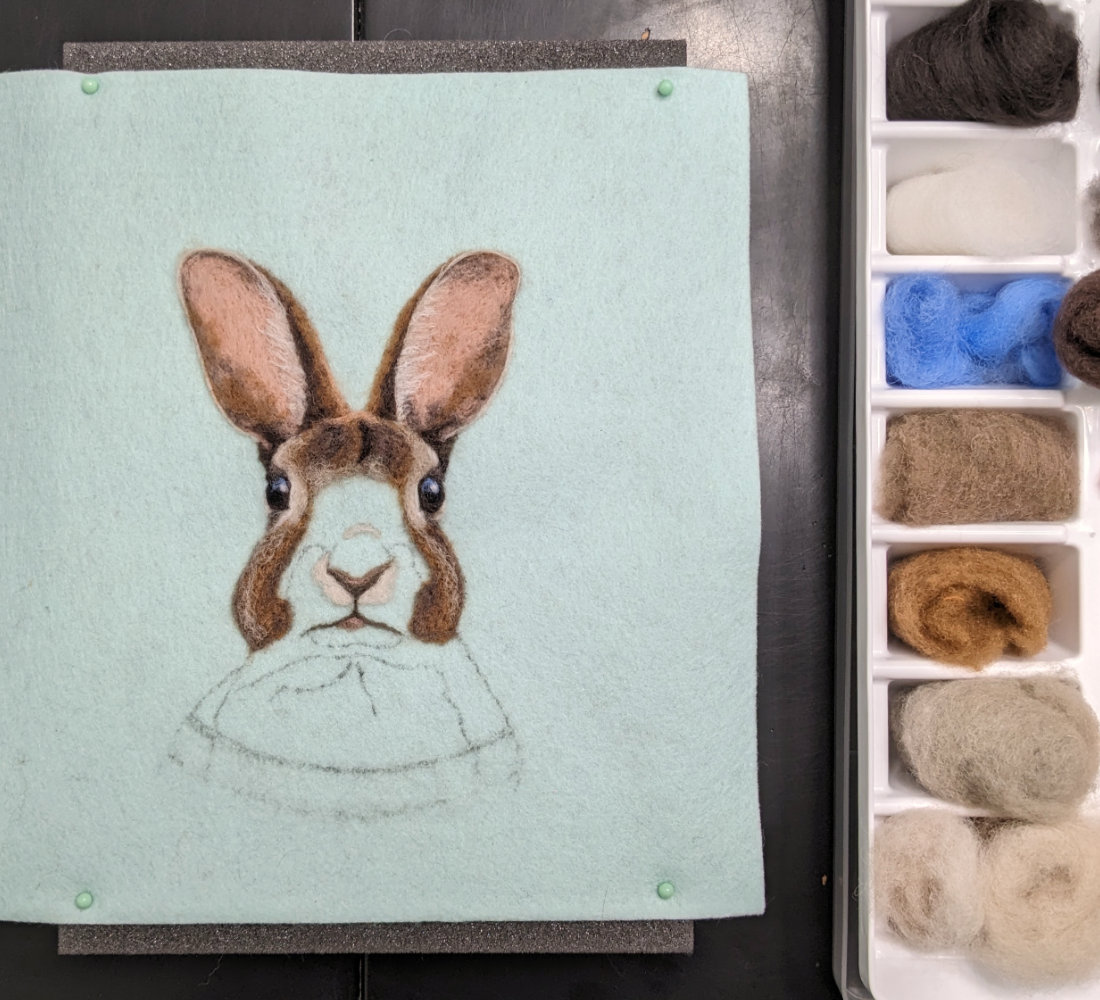
Transferring the rabbit to the felt
I chose to needle felt the rabbit on a sheet of 100% wool felt in the color Celadon from Weir Crafts. I had it in my stash and this color looked similar to the one Dani used. Weir Crafts wool felt sheets are great quality and the colors are lovely.
Once I selected the foundation for this wool painting, I needed to transfer the outline of the rabbit to the felt sheet. There was a downloadable sketch and photo reference of a rabbit included in the course. But I wasn’t happy with the rabbit’s face. For some reason, it bugged me. I found a hare in my folder of rabbit references that I liked better. But the ears wouldn’t work. So I merged the face from that hare with the ears from the rabbit in the course. Don’t be afraid to play with your images to create something you are excited about making.
I resized the merged image to fit in a 7 inch embroidery hoop (my final frame for this piece). I printed it and used the transfer method Dani demonstrated to draw the rabbit on the wool felt. That worked beautifully.
Ice cube trays make fabulous wool organizers
Since you only need small amounts of each color, I used an ice cube tray to organize my wool.
The course includes a numbered image of all the wool colors used in this project. I found that helpful and referred to it often. I decided to place the colors in my ice cube tray in the same order as the numbered image. This saved time and helped me learn their names.
My ice cube tray also has a clear plastic, removeable lid. The lid makes it easy to protect and store your wool between felting sessions.
I purchased this covered ice cube tray several years ago at Target. Unfortunately, they don’t make this one any longer. The version they have now has black rubber across the bottom third of each ice cube cavity. It seems like wool may stick to the rubber. This would mean you’d have to somehow clean it off when you change colors for a new project. I did find an alternative ice cube tray with a lid on Amazon. It looks similar to the trays I have. The only difference is the lid is blue versus clear. But it’s transparent so you should still be able to see what’s inside without opening it.
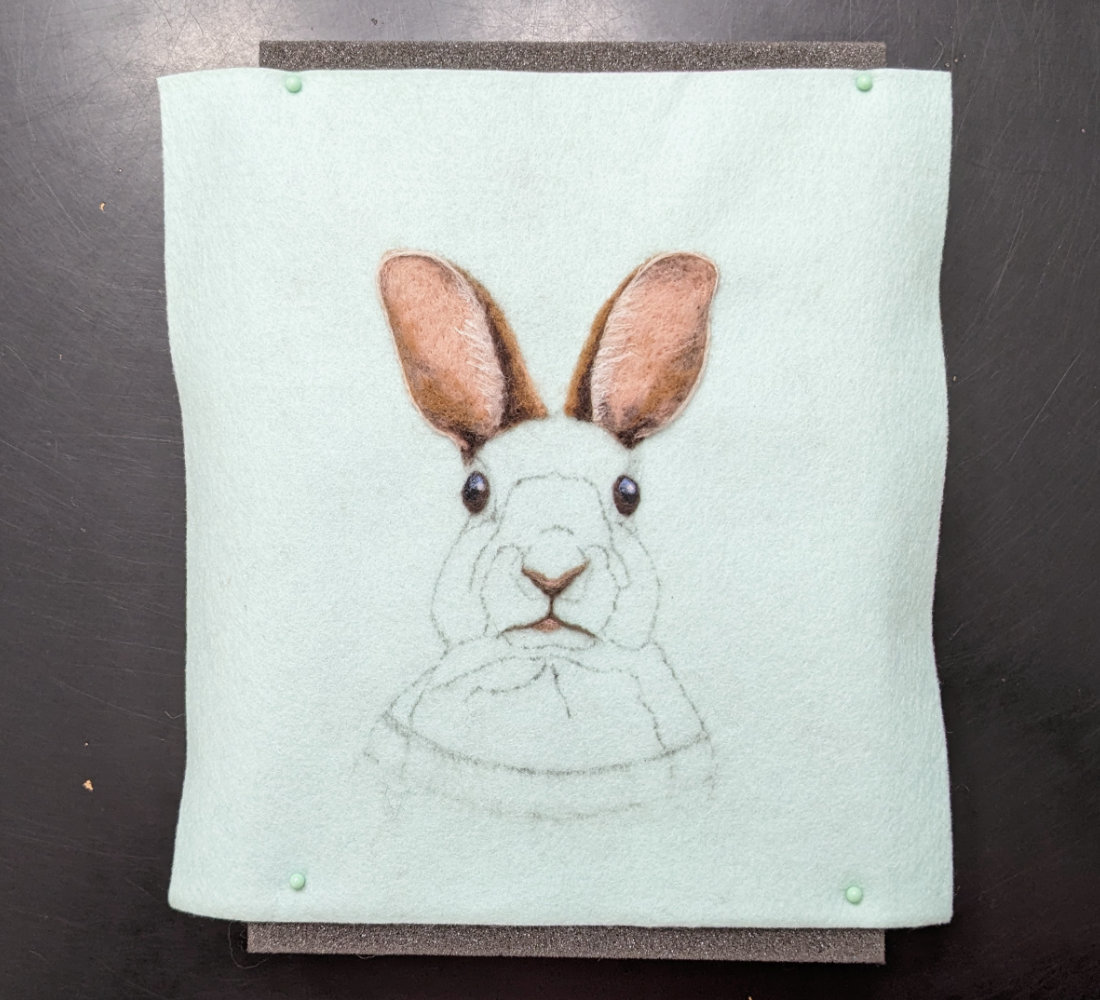
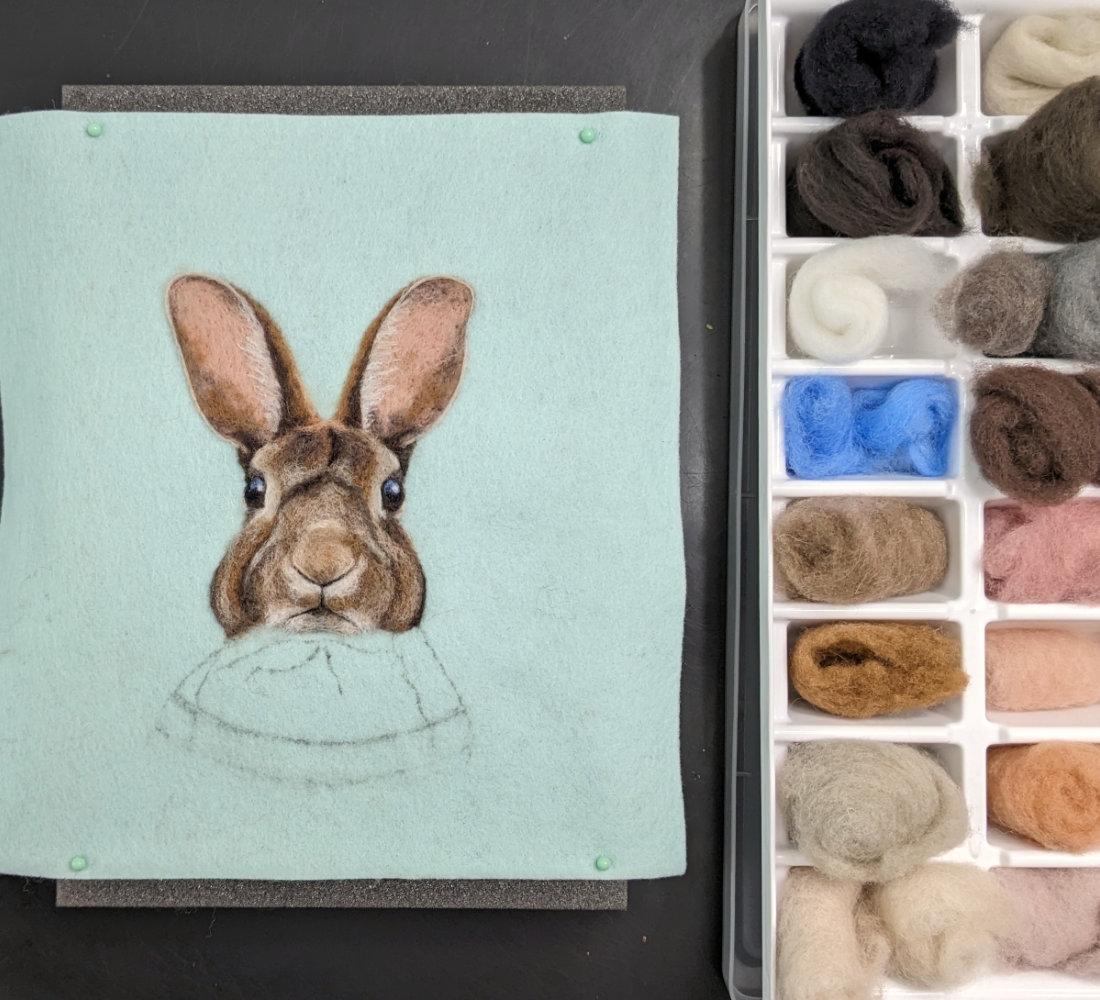
These ears were so much fun!
The project started with the eyes and a brief bit of work to indicate the nose and mouth. Then you move to the ears. While the ears are relatively quick to complete, you learn and use several techniques to create them.
One of the things I enjoy about Dani’s projects is that she sort of completes an area before moving on to the next one. There is some back and forth as you do need to make adjustments as you work through the entire painting. But mostly completing areas (like the ears) gives you a recurring sense of accomplishment.
Working on the face
Once the ears are in place, you begin working down the top and sides of the head. This involves layering different colors of wool. You also learn how to handle the form of the fur and how the light hits it.
Once you establish the forehead and cheeks, you begin needle felting the snout. This includes finishing the nose and mouth. I did add a little more detail than Dani in some areas. I was inspired to push my rabbit since it was so enjoyable to work on.
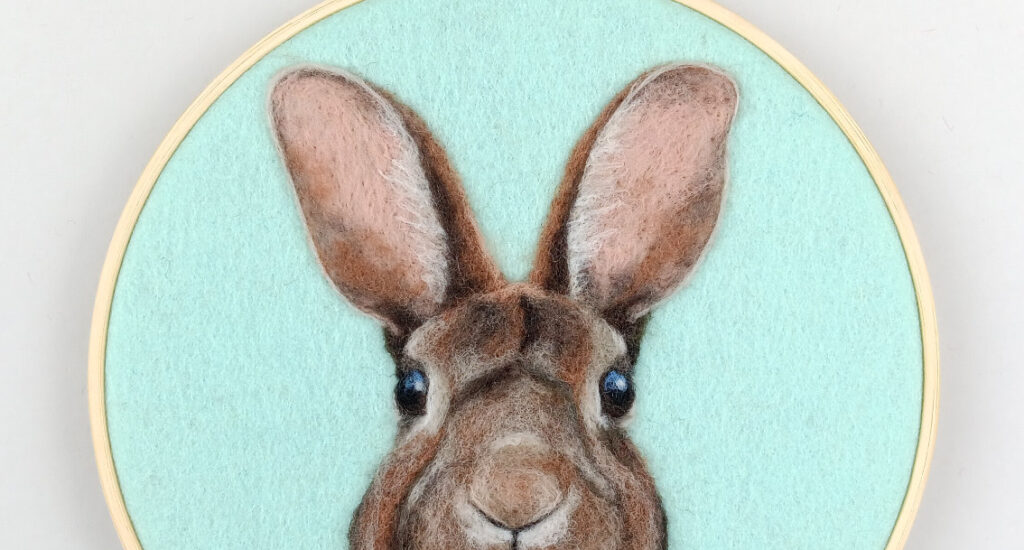
The final framed rabbit
After completing the shoulders, I lifted the rabbit off the foam pad. I stretched the piece in my 7 inch embroidery hoop. Then I followed the course instructions to glue the edges of the felt sheet to the hoop. The back view below shows the result.
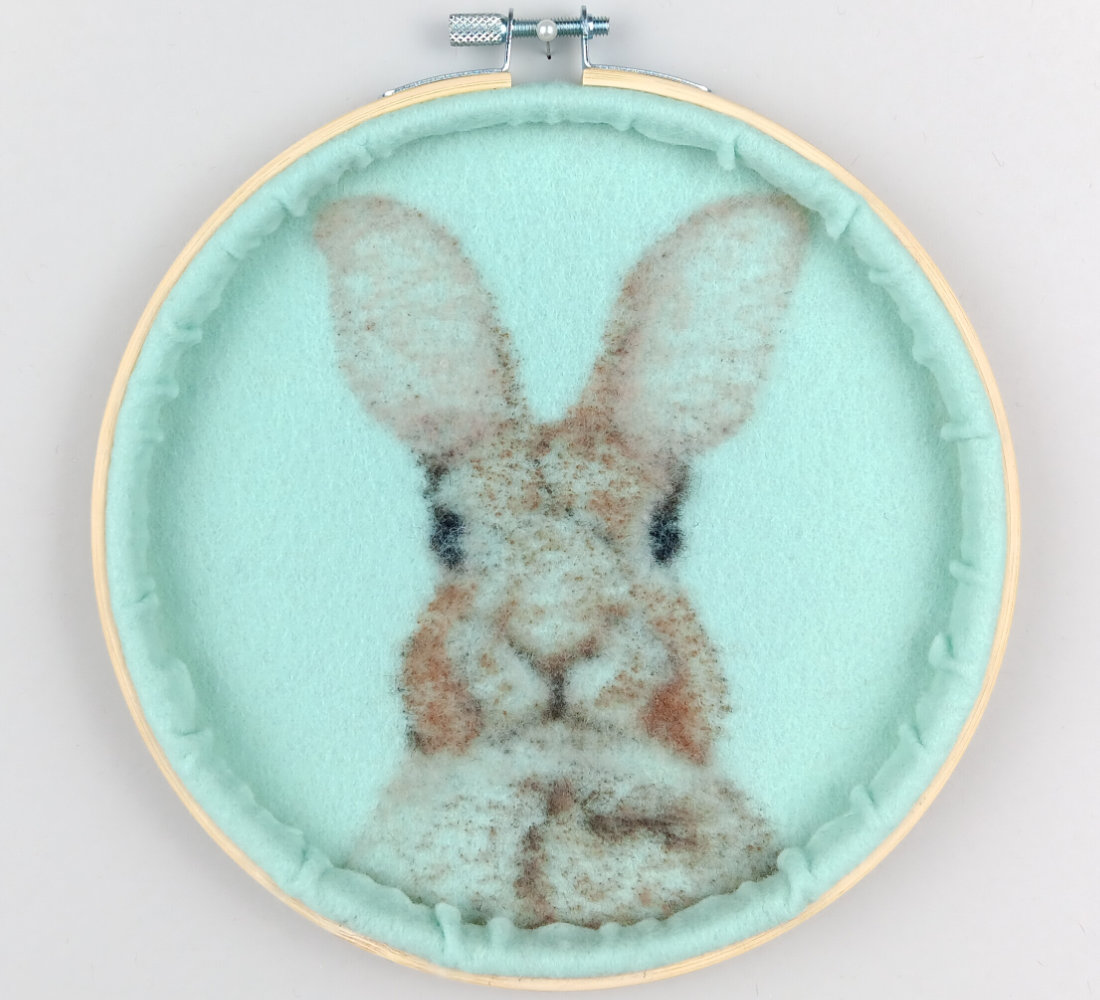
I love the ghost image that 2D needle felted pieces leave when you remove them from your felting surface. Dani said you can iron the piece from the back if you want to. But it can change the appearance of your needle felted surface on the front. Since I’m happy with the front, I decided not to risk it.
Here’s the finished rabbit!
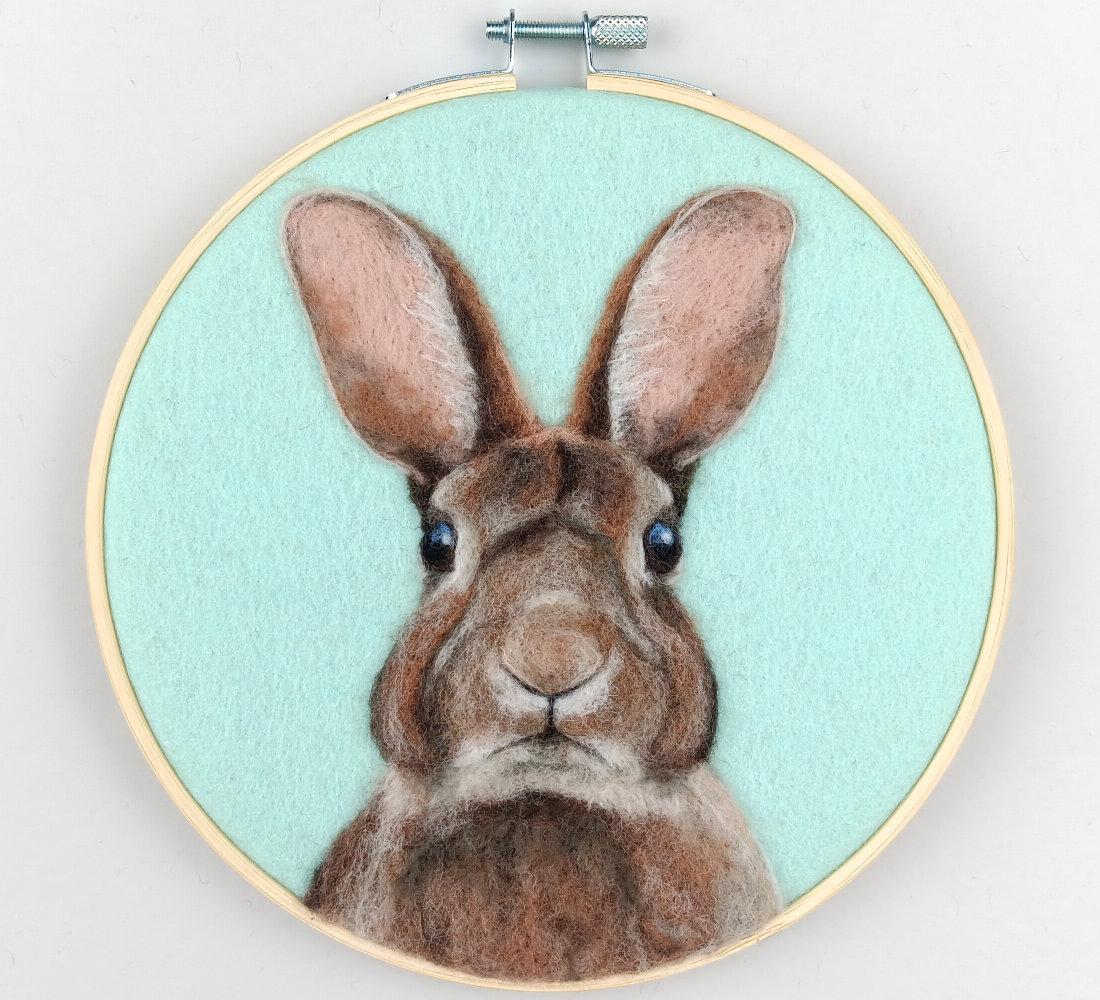
I really enjoyed this project and I learned a lot while making it. It got my 2D/wool painting juices flowing!
If you’re not ready for a large course but are interested in trying a Dani Ives’ project, take a look at my recap of her Barn Owl tutorial and kit.